Firstly, Happy New Year! Between the festivities and managing the Brighton Bash writing time has been a precious commodity so apologies for not updating sooner.
Secondly, the Brighton Bash was a success! As far as I can tell all the contenders enjoyed themselves and the only issues were the lighting (improved but the breaking of the two stand lights left us short) and terrain (we need to be smarter in how we use it. Some tables were very cramped). I wrote up a report over at the Battlefront website and there are a couple other After Action Reports (AAR) around; both Ben from Bournemouth and Soja have accounts up. The completed V1 can be glimpsed in the Battlefront report so if you want a sneak peak then go and look (and then write to BF to tell them what an awesome job the author did and he should totally get a paying writing job with them...)
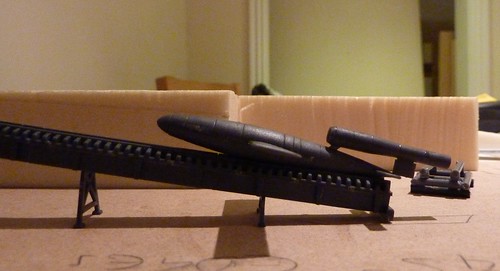
We left the last update with the rail built and the stowed V1 cut up. My next task was to build some trolleys to carry the two V1. A quick google found little in the way of primary (photos) or secondary (artists impressions or other models) source information. The only hit was a very poor photo of a 28mm scale V1 on trolley. It looked like the wings, when stowed, lay along the body. The trolley was relatively short with stubby wheels.
I had a quick scoot through the bits box and found some circular cross section sprue left from some Zvesda trucks. This I cut into short sections, trying to cut in-between the various protrusions you get on a sprue. I cut two long pieces, about as long as from the V1 engine intake to the third circular groove from the front See (Fig 3 below), plus two short bits that would string the two long bits together. I glued these together to form a rectangle.
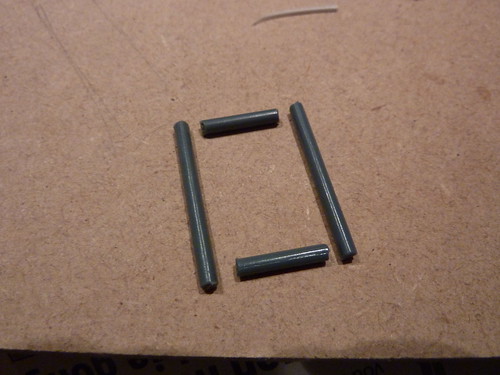 |
| Figure 1 - The chassis in kit form |
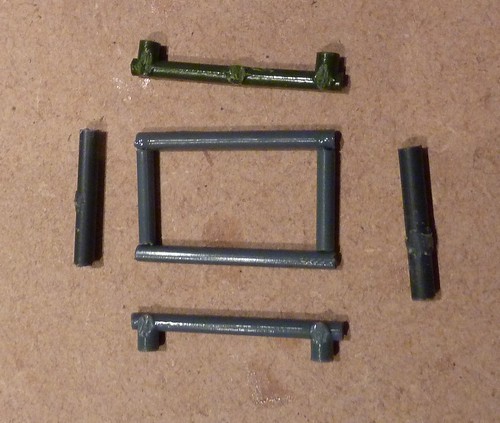 |
| Figure 2 - The assembled chassis with axels (left and right) and cradle (top and bottom) |
 |
| Figure 3 - The assembled trolley |
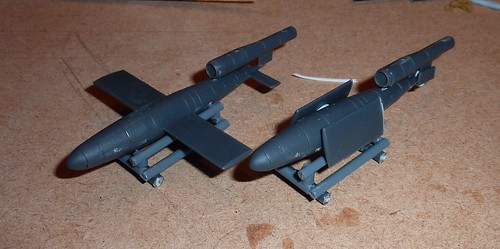 |
| Figure 4 - Two V1 ready for transport! |
At this point, the various details bits were done, it was now just a case of building the actual facility!
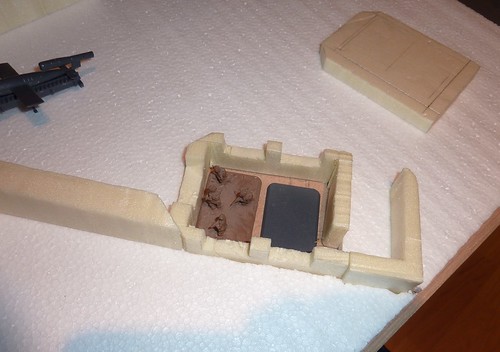
Using the model I found in the last update (reminder; this one!) I sketched out the shape for the two walls and the bunker on paper. I then used a scribe to punch this onto some high density foam (anyone who built terrain or vehicles out of card from templates in early 90's White Dwarf will be very familiar with this process!)
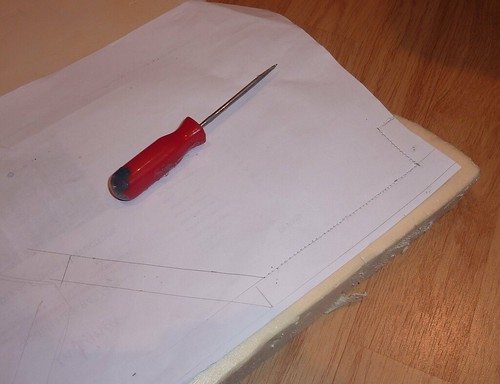 |
| Figure 5 - Stab! Stab! Stab! |
I used a hot wire cutter to carve the walls out. Initially I struggled to get a straight cut because it was difficult to keep the wire straight whilst cutting. After experimenting I found that clamping a steel rule to the table top allowed me to keep the wire running straight at the bottom and just relied on my eye/hand control to keep it running straight at the top. This made for a far straight vertical cut and better horizontal cut too!
 |
| Figure 6 - A straight edge |
Studying the picture of the V1 launch site again I noticed that the walls had a slope to them, roughly following the slope of the rail. I put the V1 in the rail, marked a spot roughly corresponding with the highest point of the V1 on the wall and then added the slope.
 |
| Figure 7 - Adding the slope |
Finally, I wanted the bunker to look like it was dug into the ground level. I took a thin (<10mm) thick bit of polystyrene, cut out the foot print of the bunker, and then used PVA to glue this to the MDF.
 |
| Figure 8 - spacious accommodation for two medium stands. Utilities extra! |
That left the complex ready for painting and detailing. I'll cover that next week.
 |
| Figure 9 - Almost ready for launch! |
Very Nice!
ReplyDeleteThanks again for a great event. I'm getting ready for the next LW one already!
BY the way if you do a themed tournament have you thought about doing it like Shifting Sands did the Bugle? A campaign/tournament? Just a thought.
Thanks again Ben
Not a bad idea. I'll have a read of the shifting sands stuff.
ReplyDelete